Introduction
- Raspberry Pi is a small computer with provision of GPIO accessibility. But in order to access the Raspberry Pi, we need a display to log in and perform other tasks. If we have a Digital display or a TV screen then we can use it to access Raspberry Pi.
- But, if we don’t have a display, we can use our Laptop screen with Raspberry Pi for accessing CLI (Command Line Interface) or GUI (Graphical User Interface) of Raspberry Pi.
- As Raspberry Pi have On-board Ethernet Port, we can use this port to connect Laptop. It does not require any Extra display apart from the Laptop’s display.
- Here, we will access Raspberry Pi home screen using Laptop through LAN/Ethernet port.
How to use Laptop Screen to access Raspberry Pi using LAN
To access Raspberry Pi on Laptop screen, follow the steps given below,
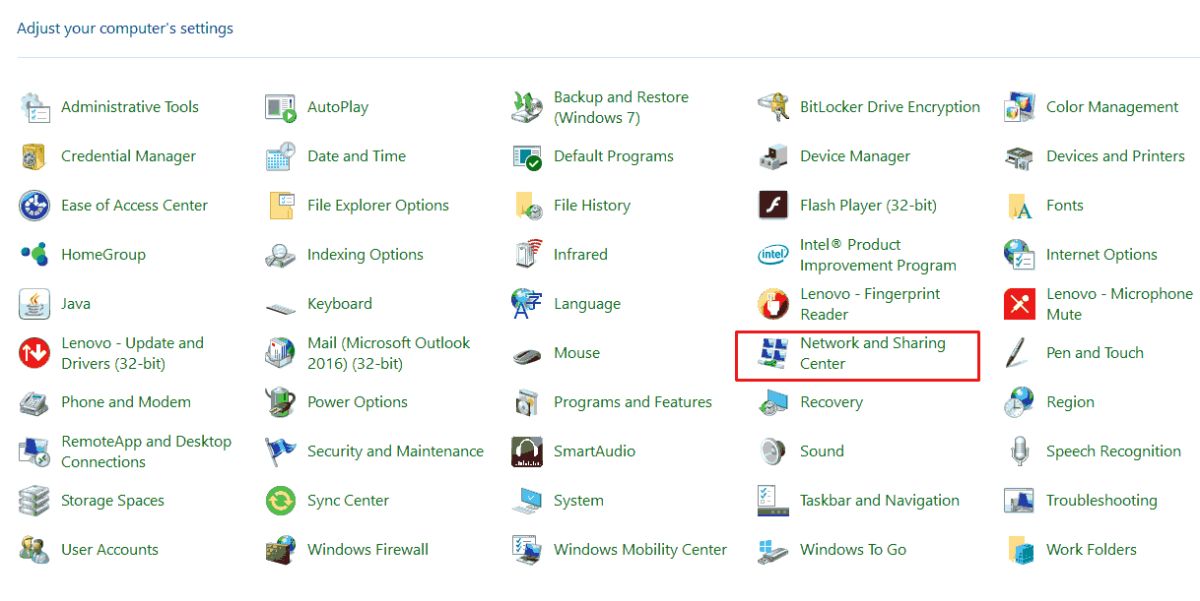
Open Control Panel and select Network and Sharing Centre.
Then, select change adapter settings option
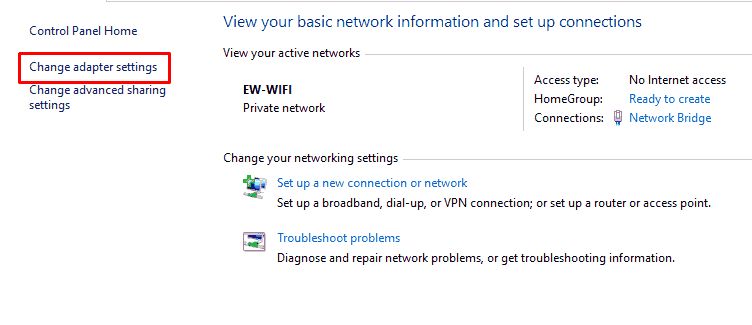
After selecting change adapter settings option, we will get window which is as shown below:
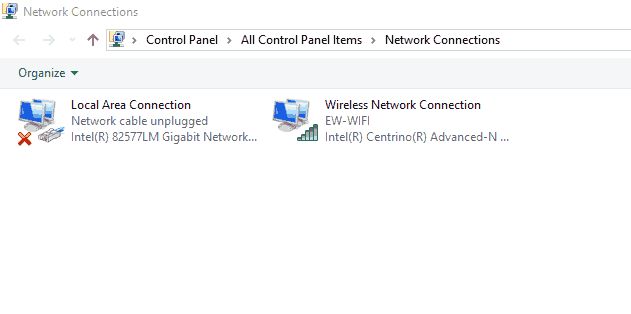
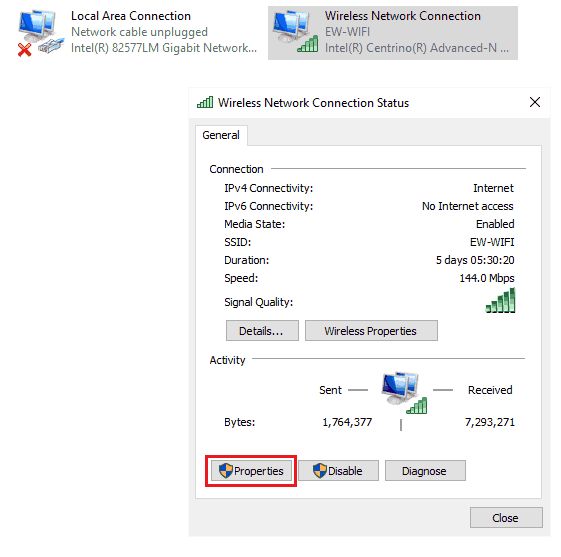
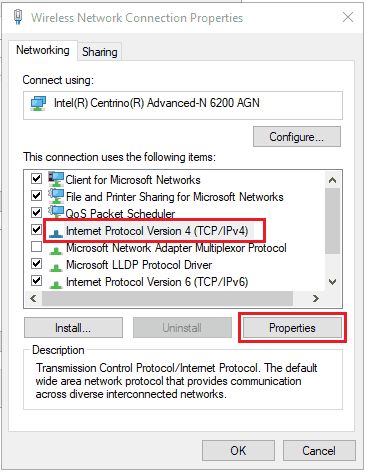
Now, check properties of both LAN and Wireless Network connection. Double click on Wireless Network connection and select properties option as shown below.
In properties, check for IPv4 configuration as follows.
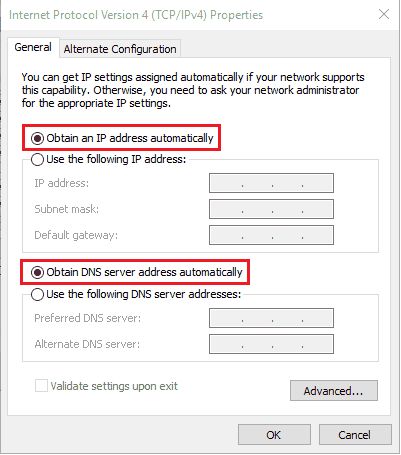
After selecting IPv4 properties, make sure that obtain an IP address automatically and obtain DNS server automatically option is selected as shown below.
Do the same process for Local Area Network (LAN).
Now, select both Local Area Connection (LAN) and Wireless Connection Network and create network bridging connection between them. This can be done by right clicking on them which is shown as follows.

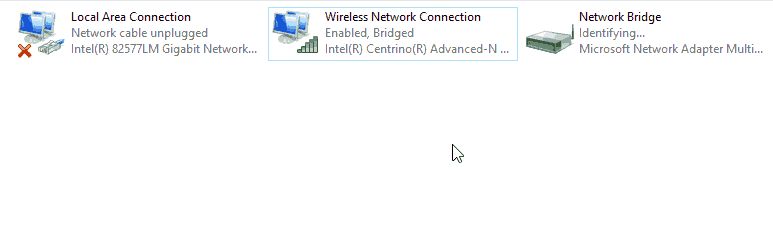
Now, bridge is created in between them as shown in below image.
Now, connect LAN cable with one end connect to Raspberry Pi and other end connect to the Laptop.
Now, check your IP and Default Gateway IP by entering following command in the command prompt of windows.ipconfig
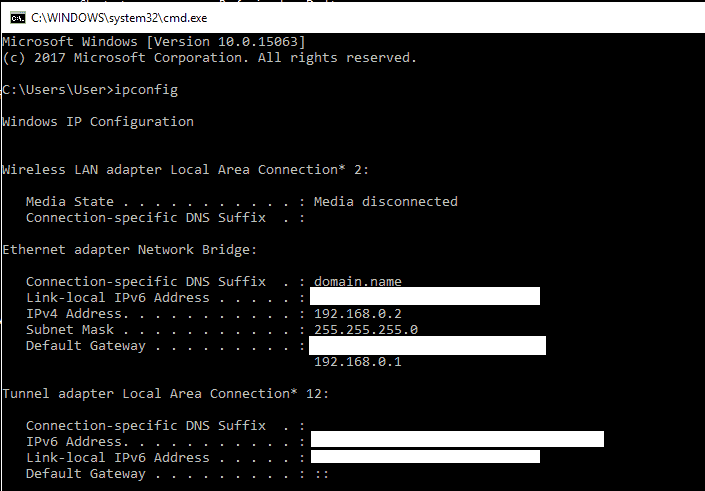
We can see in above image the default gateway IP is 192.168.0.1. So, our Raspberry Pi’s dynamic IP will be in the range of 192.168.0.2 – 192.168.0.255 as it is in the same network.
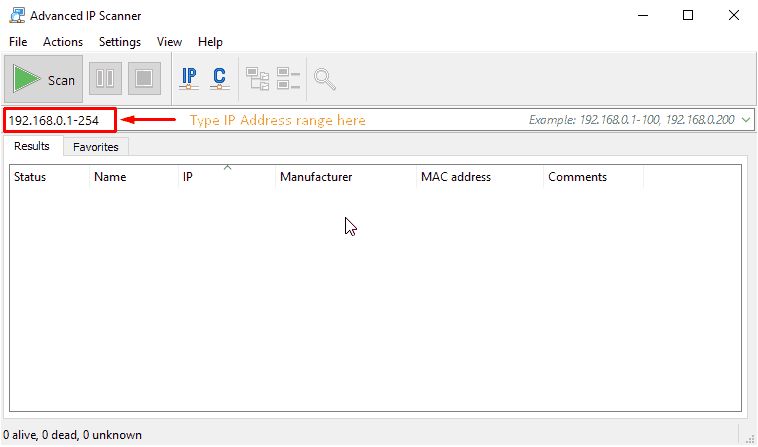
We need to know IP address of Raspberry Pi for logging in Raspberry Pi using SSH (Shell Script). We can find this IP address using “Advanced IP Scanner” Application. Install this application and open it.
After opening this application, we will see a window as shown below,

To search IP address assigned to Raspberry Pi, please type the IP address range of network as shown in below image
And click on Scan button.
We will get IP addresses of all devices connected to the network as shownbelow,
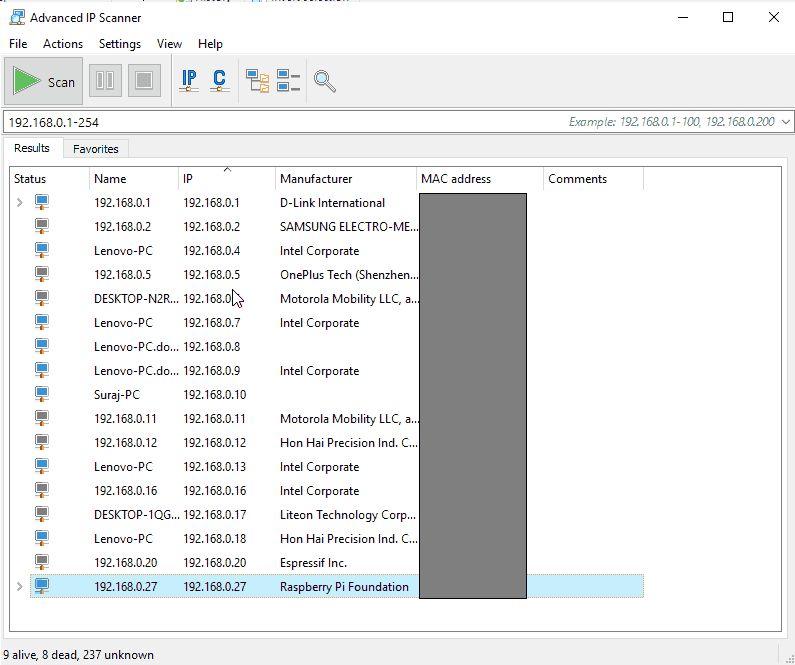
In above image, we can see IP address of Raspberry Pi.
To Login into the Raspberry Pi, use Putty for using SSH port. Open putty and enter Raspberry Pi’s IP address in Host Name Field.
Still facing Problem in Accessing Internet?
After sharing wi-fi with Raspberry Pi through LAN (ethernet), we need to test that our internet is working or not. We can test this by using ping request as shown below,
e.g. ping http://www.google.com
If ping request is successful then our internet is working properly. But, if it is not responding then we need to resolve this internet connectivity problem.
To solve this issue, we can do following things,
Add dns-nameserver and nameserver manually. To do this open resolv.conf using following command.
sudo nano /etc/resolv.conf
Add our default gateway as dns-nameserver and 8.8.8.8 as nameserver which is shown below,
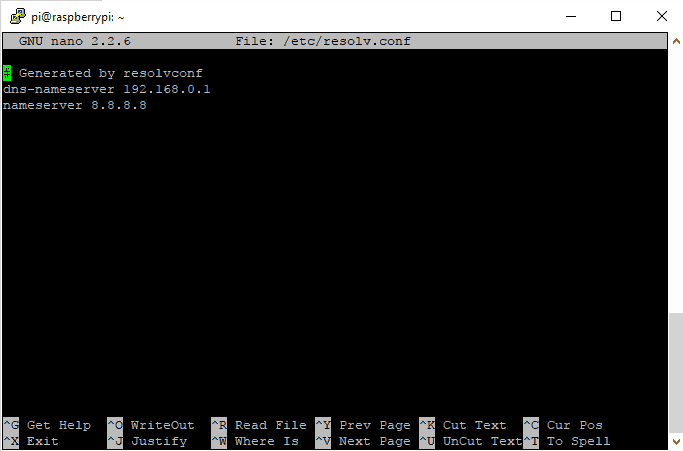
And save the above configuration.
To make this change permanent, enter following command
sudo chattr +I /etc/resolv.conf
And reboot the Raspberry Pi.
Now, you can access internet over Raspberry Pi.
